

Roof Top Heat & Glue top layer
Bitumen top layer
Roof Top Heat & Glue is the top layer of a 2-ply bitumen roof covering. It ensures a waterproof flat roof. This roofing membrane has an extremely strong combined reinforcement that makes it resistant to cracking. It can be walked on and is resistant to extreme temperature variations. The top side of this top layer is finished with sand. The underside has a macro-perforated film that allows the roofing membrane to be cold glued or installed with a roofing torch.
- Can be glued or heat-welded
- Crack resistant
- Resistant to extreme temperature variations
 Step-by-step plan
- First dry the existing roof covering and remove all dust and grease. In the case of renovation, repair any blisters, cracks and tears in the weathered bitumen substrate with elastic ROOF REPAIR REGULAR. Reinforce with ANTI-CRACK, a tear-resistant polyester fleece. For optimum adhesion of the new roof covering to old roofing, apply 1 coat of ROOF PRIMER ROOFING bonding varnish, which fixes any residual dust.
- Place the ROOF TOP HEAT & GLUE on the roof surface. Always start at the lowest point of the roof, i.e. the side with the rainwater outlet. Lay the top layer in the same direction as the underlay or the existing roof covering used as an underlay, but staggered by 50 cm. To achieve this, halve the width of the first roll of roofing membrane. This type of roofing membrane can be glued with ROOF GLUE ROOFING or heat welded.
- Place the roll where you wish to install it, unroll it a little with your foot and align it. Then roll it back up. Aim the roofing torch at an angle towards the bottom of the roll (30% of the flame towards the roll and a maximum of 70% towards the roof surface). Slowly move the roofing torch from one side of the roll to the other. Unroll the roofing membrane by pushing the roll with your foot. The membrane only needs to melt a little before advancing. Never aim your roofing torch at one spot for too long. When you have heated the membrane sufficiently, a small bead of liquid bitumen will be visible at the edge of the roll.
- When installing the next roll of roofing, ensure an 8 cm overlap lengthwise. Cut the roll to size, align it and then roll it up again. Install the roll of roofing with a roofing torch. Ensure a 15 cm overlap in the width (the end seams between the rolls). Make sure the end seams are staggered relative to the underlying and adjacent roofing membranes. Always cut the roll to size, align it and roll it back up before heat welding it in place. Continue working like this until the roof surface is covered.
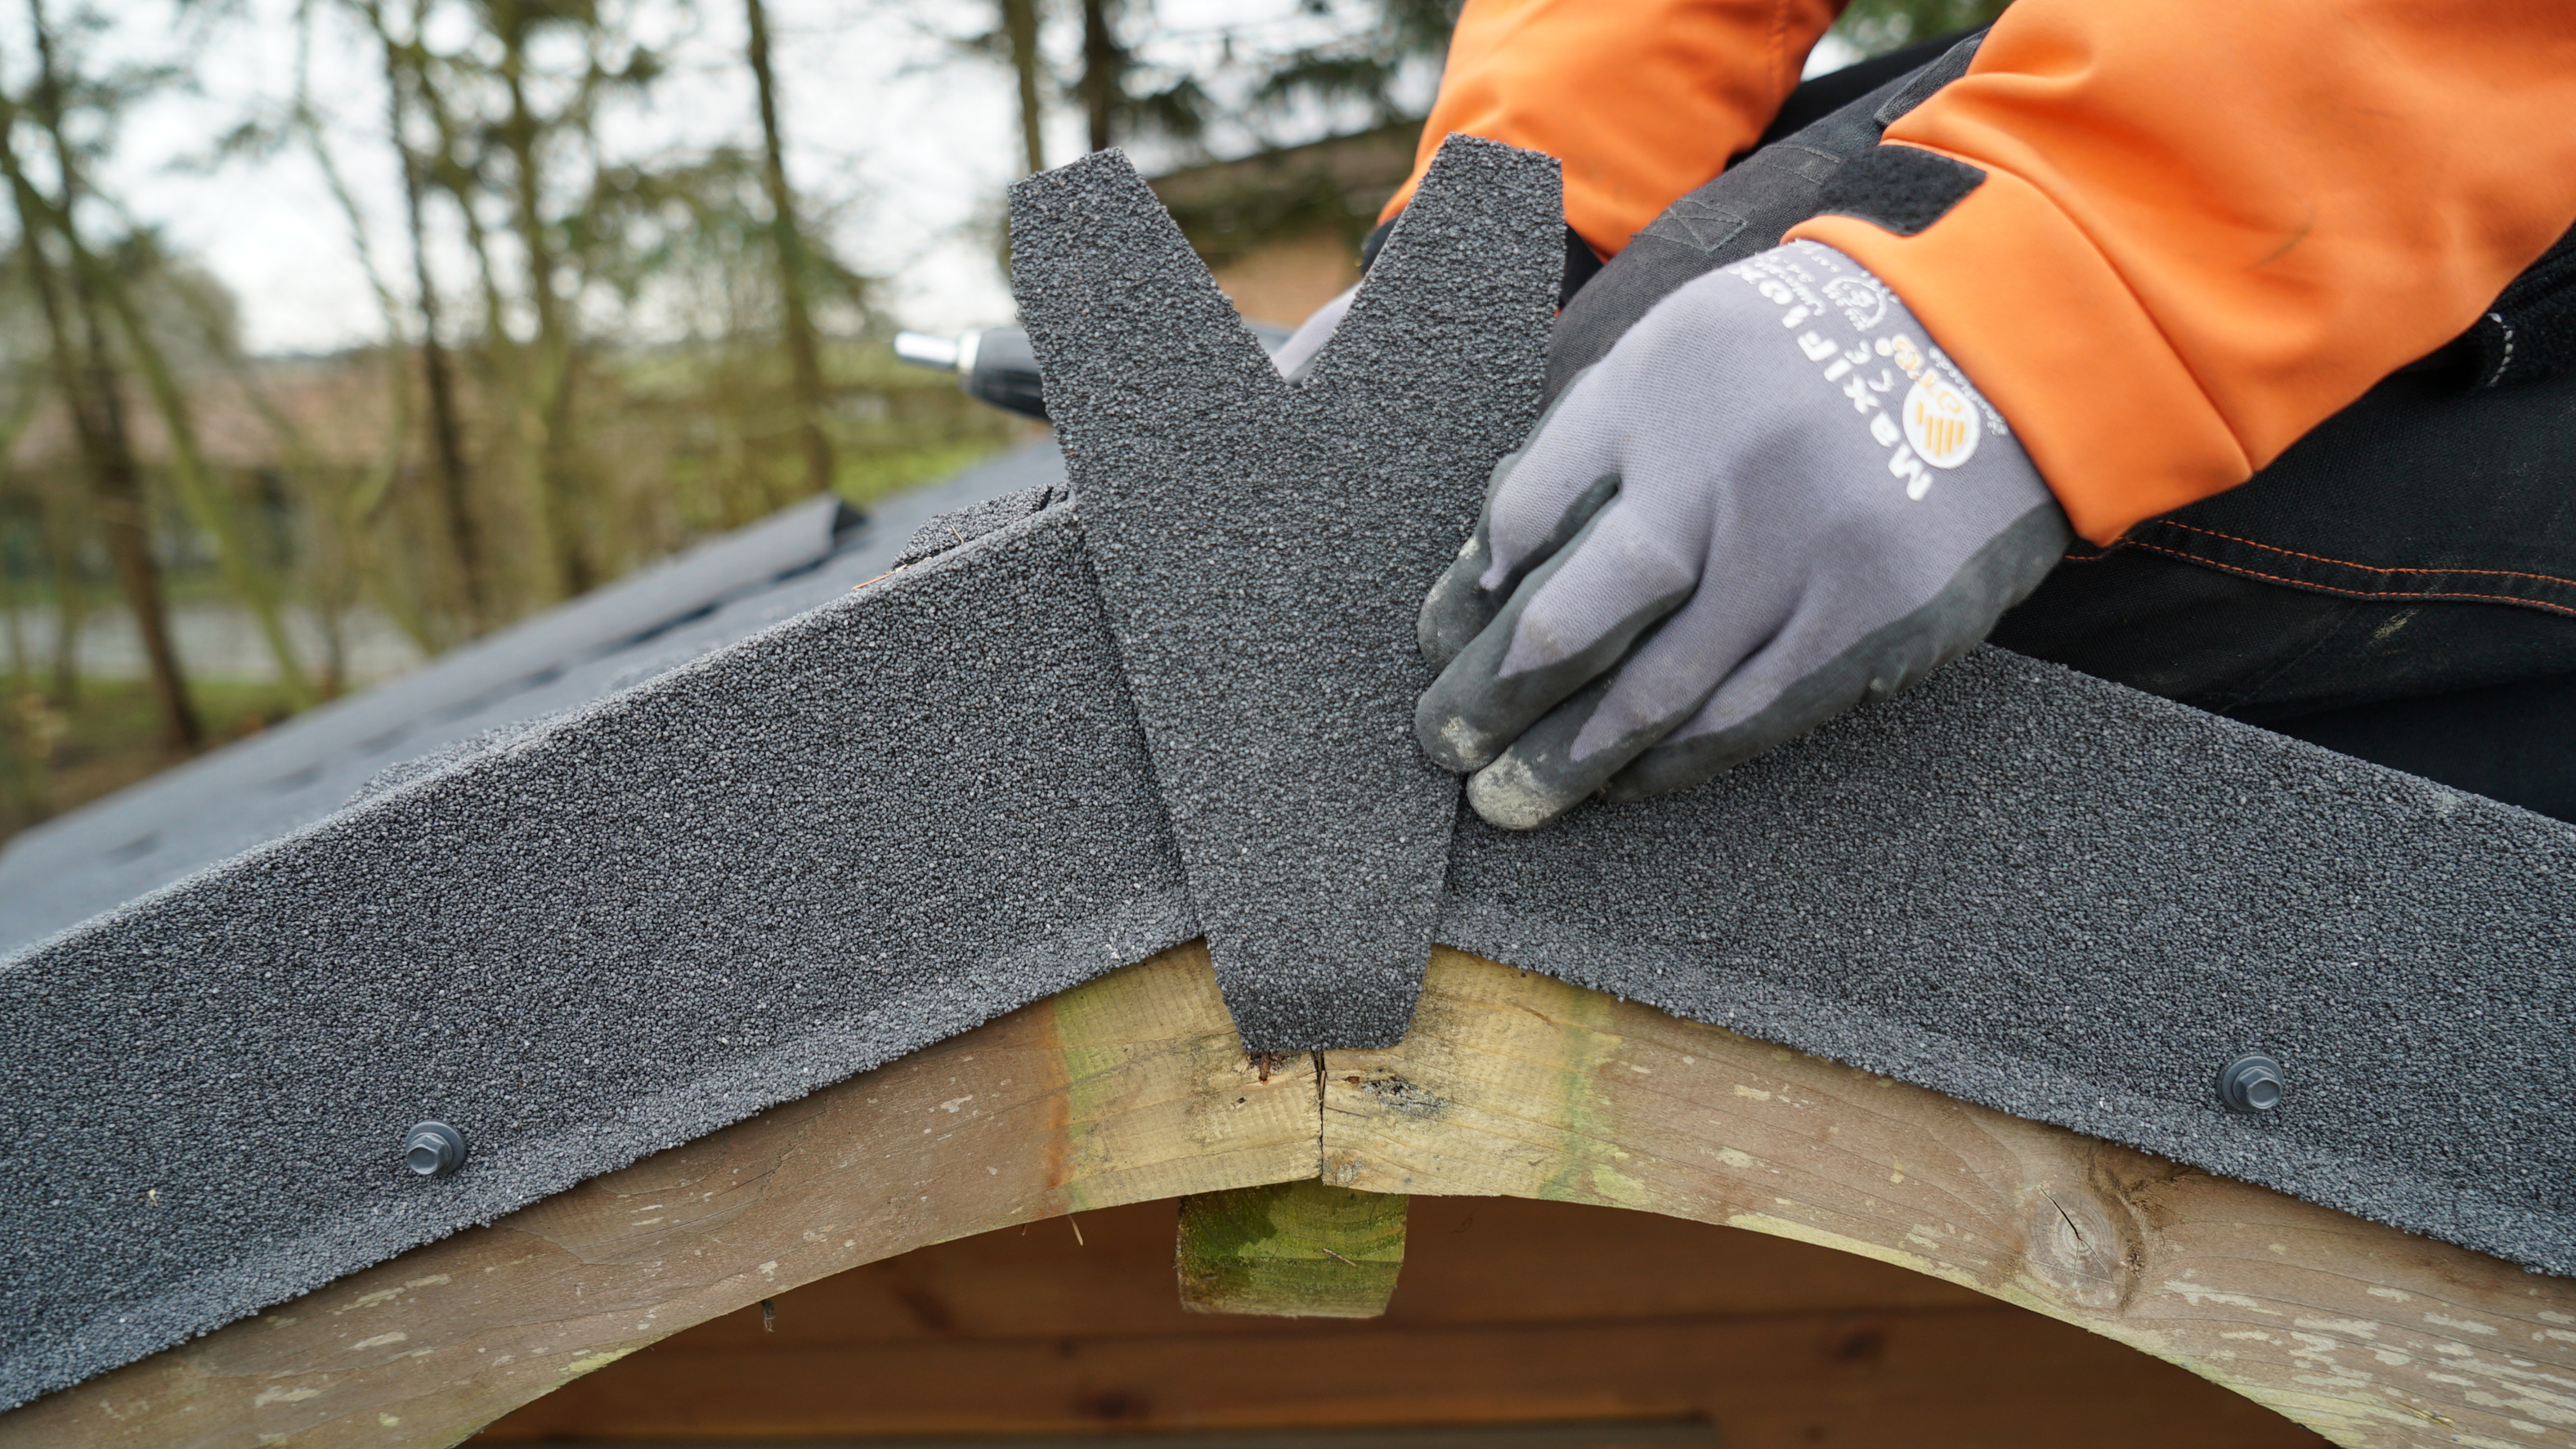
- Finish the roof upstands with strips of ROOF TOP HEAT& GLUE. Ensure the strip covers the upstand completely and 15 cm of the roof surface. Cut the roofing membrane into strips of the correct length. Cut the corners of the strips at an angle.
- Start in the corner of the roof upstand. Cut the strip at an angle at the upper intersection of the roof upstand. Make a second angled cut in the corner of the roof upstand. Heat the lower parts first and work your way up.
- Now finish the other side of the corner. Cut the strip to size and cut the corners at an angle. Cut the strip at an angle. Carefully fold the strip into the corner. Heat the lower parts first and work your way up.
- First cover the upstands with strips. Cut the strips to size. Cut the corners at an angle and ensure an overlap of at least 10 cm. Remove the slate granules from areas where there will be an overlap. Do not start heat welding until all the strips are ready. Press the strips firmly into the corners of the roof upstand. Make sure there are no gaps. Use a roof roller to ensure proper adhesion.

Documents
Calculate how much product you need
* By using this calculation module, one agrees to the terms of use: All results are indicative and approximate only. Aquaplan can in no way be held responsible for deviating results resulting from the use of this calculation module.
Technical features
| Dimensions | 600 × 100 × 0,4 cm |
|---|---|
| Variation | Roof Top Heat & Glue 6 m |
| EAN | 5413466954575 |
| Material | Plastomeric bitumen (APP) |
| Product use | Waterproofing for flat and pitched roofs |
| Volume | 6 |
| Expected lifespan (in years) | 35 |
| Thickness (mm) | 4 |
| Length (mm) | 6000 |
| Width (mm) | 1000 |
| Surface area (m²) | 6 |
| Installation method | Fully torched on, Glued, Loosely laid and ballasted |
| Required tools | Gas burner or Floor squeegee |
| Content indication | M²/Roll |
Onze cookies zijn waterdicht
Functioneel Always active
De technische opslag of toegang is strikt noodzakelijk voor het legitieme doel het gebruik mogelijk te maken van een specifieke dienst waarom de abonnee of gebruiker uitdrukkelijk heeft gevraagd, of met als enig doel de uitvoering van de transmissie van een communicatie over een elektronisch communicatienetwerk.
Voorkeuren
De technische opslag of toegang is noodzakelijk voor het legitieme doel voorkeuren op te slaan die niet door de abonnee of gebruiker zijn aangevraagd.
Statistieken
De technische opslag of toegang die uitsluitend voor statistische doeleinden wordt gebruikt.
De technische opslag of toegang die uitsluitend wordt gebruikt voor anonieme statistische doeleinden. Zonder dagvaarding, vrijwillige naleving door uw Internet Service Provider, of aanvullende gegevens van een derde partij, kan informatie die alleen voor dit doel wordt opgeslagen of opgehaald gewoonlijk niet worden gebruikt om je te identificeren.
Marketing
De technische opslag of toegang is nodig om gebruikersprofielen op te stellen voor het verzenden van reclame, of om de gebruiker op een website of over verschillende websites te volgen voor soortgelijke marketingdoeleinden.